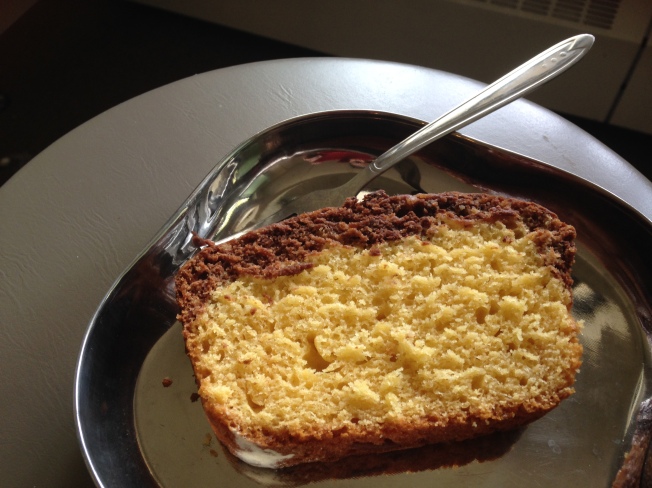
Mango Chocolate Loaf Cake

Standard
mango loaf cake 1

A slice of pleasure!

Mangoes are the such a big part of Indian life – there are as many varieties as there are apples in north America. No doubts we miss the kilos and kilos of mangoes we consumed back home in summers. To compensate for that, there is canned mango pulp available in Canada – which surely does not make up for the original aromatic fruit, but is ok for a substitute in cooking and baking. The first can of pulp that i bought was used in creating this loaf – a combination of mangoes and chocolate gives it a delicate aroma and flavor.

Recipe source – Spicy Treats

Ingredients –

Dry ingredients –
All Purpose Flour/ Maida – 2 cups
Baking Powder – 1 and 1/2 tsp
Baking Soda – 1/2 tsp
Salt – 1/4 tsp

Wet ingredients –
Sugar – 3/4 cup
Oil – 5 tbsp ( used light tasting olive oil we get from Costco)
Vanilla extract – 1 tsp
Mango pulp – 1 cup ( i used the canned Deep brand Sweetened Kesar mango pulp)
Milk – 1/2 cup

Other –
Cocoa Powder – 1/4 cup (mix in 2 tbsp warm water)

Method –
1. Grease a 9 by 5 loaf pan with oil/ butter.
2. Preheat the oven to 350 F.
3. Mix all the dry ingredients in a mixing bowl – it is great if you can sieve them, else just use a fork to make sure everything is evenly mixed.
4. Whisk together all wet ingredients till they blend well. Add in the dry ingredients in two parts to make a lump free batter.
5. in a small bowl, mix the cocoa powder with warm water to make like a smooth paste.
6. Take part of the batter you made in step 4 in another bowl and mix in the cocoa paste, to get the chocolate batter.
7. Now, in the loaf pan, add the mango batter and layer the chocolate batter above it. Or based on how fancy you want to go, add them by dollops till both batters are finished.
8. Bake in the preheated oven at 350F for 50 to 55 mins.
9. Let it cool, slice and enjoy!

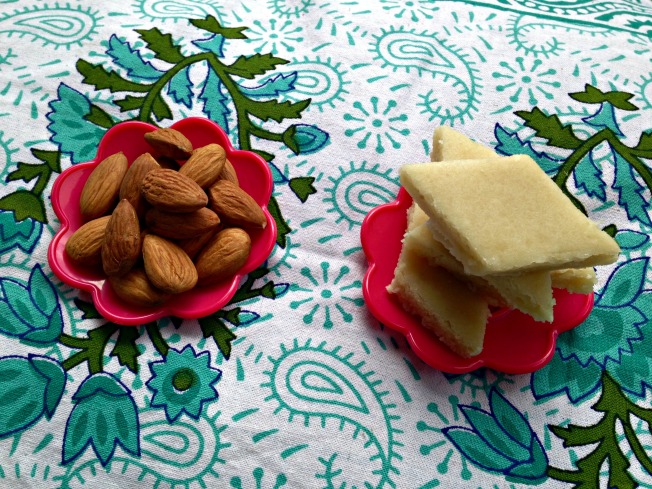
Badam Katli – Almond fudge

Standard

Kaju katli (cashew fudge) should be declared the national sweet of India without doubt. It’s clout crosses all regional boundaries. So while you will not expect to find MysorePak in north India and Gujhiya in the south – you will find Kaju Katli in each and every part of the country – same diamond shape, same taste. So while Nilesh may claim that the only ‘authentic’ samosa is the one sold in Varanasi and I am super proud if the authenticity of Indori poha, there is no authenticity claims around the humble kaju katli. You always get the real deal – buy it from anywhere from the airport outlet or small town mithai shop. With only three ingredients – this classic magical sweet goes strong – without any competition touching it.
Now the reason this post goes on and on about kaju and not badam is that I made badam katli because I miss kaju katli immensely. This may sound strange to a lot of people but in my small town in Canada, I can easily buy almonds, walnuts, pecans and other nuts I have never heard of before,but I can’t find raw cashews. The Indian Store sells some in small packets, but I dont go anywhere near stuff without a ‘packed on’ or ‘best by’ date, so that’s a no go for me.
So the story is that I was missing kaju katli and Aditi was missing ‘diamond mithai’ as she calls it and I was browsing the food blogosphere when I saw this badam katli recipe – which is modeled after a kaju katli recipe. It looked pretty promising and I decided to give it a try. The results were great. It’s quick and easy – and has to potential to make you happy and a bit sad with nostalgia in the same moment. Give it a try and you will know what I mean.

Badam Katli 1

Recipe Source – Spicy Treats (step by step instructions are here)
Ingredients –
– 1 an 1/4 cup blanched almond flour OR 1 cup whole almonds (badam)
– 3/4 cup sugar
– 1/4 cup water
– 1/4 tsp ghee or 1 tbsp milk (optional, only if required).

Method –
1. If you have blanched almond flour, go right ahead with rest of the recipe. I made my own almond flour using these steps –
a. Heat 2 cups of water in a saucepan. Let it come to a rolling boil.
b. Switch off the heat and dump the almonds in the boiling water. Cover and let it be for half an hour.
c. Take the almonds out of the water and give them a quick wash in cold water. Proceed with taking out their brown peel. It is super easy to peel them – Aditi did that for me. Let the peeled almonds dry on a kitchen towel – I just left them on the kitchen counter overnight.
d. The peeled, dried and soft almonds are now ready to be ground into flour – I used my magic bullet for it. Dont try to make into a smooth and fine powder – you will end up with almond butter. Try to get a grainy, no-big-chunks powder and you are good. One cup almonds will yield 1 and 1/4 cups of almond flour. Keep aside.
2. In a thick bottom wok, dump the sugar and water. The water will barely cover the sugar but that is what we want.
3. Stir occasionally on medium heat till the sugar is all dissolved and things start to boil – we are looking for a single string consistency syrup. It took me five years to get what it exactly means – keep trying and you will too!
4. When the desired consistency is reached,reduce the heat to low and tip in the almond flour. Mix and mix to get a lump free deal.
5. Increase the heat to medium again and keep stirring for another 3 minutes, the whole mixture should come together as a single mass and when you try to roll some between your fingers, you get a not-very-sticky ball. Switch off the heat and let this cool down to being warm not hot. This takes half an hour.
6. dump the contents to a parchment paper or big plate and start to knead. The almonds will release a lot of fat and your hands will be all glossy. If you have over-cooked it, your mixture will be a bit dry and crumbly – dont lose heart. Add the ghee and milk little by little and start to knead – you will get there.
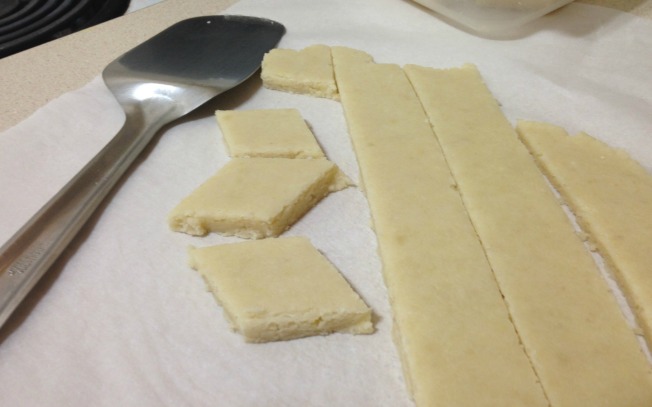
7. Once it looks smooth and glossy, put another parchment paper on ball of dough and start to roll it to get a sheet of 1/2 inch thickness.
8. Cut into diamond shapes and store at room temperature. If you did not need any milk to knead it, this will have a very long shelf life. Else, finish them in a couple of days.badam katli 3

Besan Burfi – from the heirloom

Standard

This is my mom’s signature dish – she has been making this since decades literally. All my relatives, cousins, friends love it. Because of the long shelf life of this sweet, it is often packed along as a parting gift, and many times is made in large quantities to ‘pack with love’ in the luggage for folks going out of the country for study or work. Chickpea flour roasted in loads of clarified butter with sugar and nuts added is considered to be a nutritious and energy boosting combination – though the truth is that the same combination makes it super calorie dense and irresistible – and when chomped down in five-at-a-time portions, it gives you more energy than needed for a full marathon – and IMHO should be banned for people who type and talk for a living (that would be me and 95% of the people around me). But then for my kinds, everything but spinach should be banned, and since it is not, why not indulge into this culinary pleasure?
Now since this recipe comes from my mom, who knows the microwave as a machine to re-heat and not as chef Mike who would ‘cook’ all meals on all weekdays, the recipe literally involves labor and love – in simple terms – elbow grease! Don’t even think about it unless you are ready to spend like an hour peering over the wok, vigorously stirring a mixture of flour and butter – trying to roast it and prevent it from burning at the same time. You also need some kind of special vision – to distinguish between yellow,dark yellow, brown, golden brown and umm..burnt! Jotting down the recipe here, though in this age of ready-to-cook meals, I am positive Aditi will never even think of attempting it, but at least I will have the satisfaction of having passed on a tradition – from one generation to another.
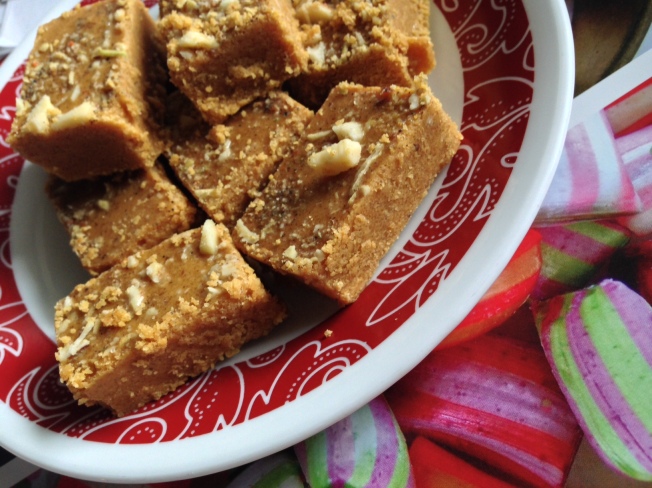
besan burfi1

Ingredients –
Chickpea flour/ Gram flour/ Besan – 3 and 1/4 cup
Semolina / Rawa/ Sooji – 3 tbsp (optional)
Ghee/ Clarified butter – 1 and 1/4 cup
Sugar – 2 and 1/4 cup
Cardamom / Ilaichi powder – 1/2 tbsp
Ground almonds – 1/2 cup
Almonds – slivered – 1/4 cup (for garnishing – optional)

Method –
1. Add the besan and ghee in a thick bottomed wok and put it on the burner on medium heat.
2. If you are using the regular fine textured besan, and like a grainy texture, add the sooji too. Else, leave it out. There is also a mota besan which has been ground to have a grainy texture, a lot of people use it – you don’t need the sooji in that case.
3. Keep mixing and turning the mixture at it starts to cook – don;t even think about raising the gas mark to high to expedite the process – the roasting needs to be done slowly and uniformly.
4. After five minutes of continuous stirring, your mind will start to tell you that it has been very long and the besan looks roasted. Dont give in to those mind games. Keep an eye on the watch – like baking. It takes 30 to 35 minutes to get this quantity of besan perfectly roasted, so have patience and continue.
5. After 30 minutes, the color will change to a golden brown, there will be a nice earthy aroma all around the kitchen – add in the ground almonds and cardamom powder at this stage and switch off the gas. Remove the wok to a cold burner – it takes seconds for the besan to burn – it will go from brown to black and bitter.
6. Let this whole deal cool for 20 to 25 minutes. Meanwhile, take a big steel plate with raised sides or a baking tray and grease it’s surface with ghee or oil.
7. Once the the besan is warm (not hot), which it should be after 25 minutes, add the sugar and mix. Dont add the whole sugar at one go, keep adding and mixing half cup at a time. Taste the mixture if you want less or more sugar.
8. The mixture will be pretty liquid-y, don’t worry about it – that is the way it should be. Dump the whole thing in the big plate or tray and smooth the surface using the back of a spoon or bowl. Sprinkle the slivered almonds or pistachios, I has some Everest Doodh Masala too which I spread on it.
9. Put the tray in the fridge for an hour and later, cut into pieces using a sharp knife.
10. Store in an air tight container for up to a month – it has no water or dairy so has a long shelf life.

besan burfi4

Ready to be cut in to pieces.