Monthly Archives: December 2015

Chocolate Cutout Cookies

Standard

IMG_1107

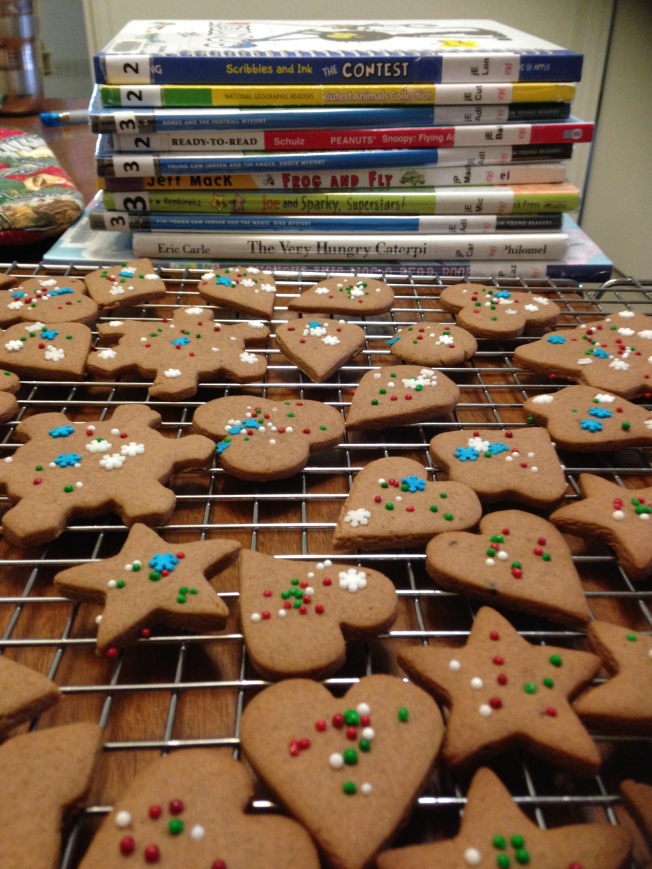
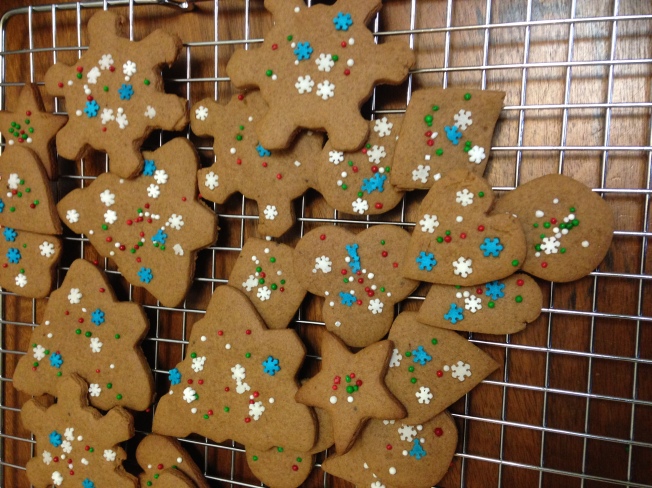
Here is another cookie I tried these holidays and they were super loved by Aditi. The cookies are chewy as they call for brown sugar and honey. There are no eggs involved and melted butter is used – so there is no waiting for the eggs and butter to get to room temperature. The festive sprinkles bring color to the cookies as well as to the atmosphere .

Recipe source – Spicy Treats.

Ingredients – (made 24 cookies, but the number depends on the size of cookie cutters used).
1 and ¼ cup – APF (maida)
¼ tsp – Baking powder, ¼ tsp – Baking soda
¼ tsp – Salt
¼ tsp – Instant Coffee Powder
1 tbsp – Cocoa powder
¼ cup – Butter
¼ cup – Honey
¼ cup – Brown Sugar
½ tsp – Vanilla Essence
2-3 tbsp – Milk
Colored sugar sprinkles for decoration

Method –
1. Melt the butter. I just kept it on a burner for 5 minutes, left warm after I switched it off.
2. Add honey and brown sugar to it. Mix so that everything dissolves. Add vanilla essence too. Hold off the milk for now.
3. In a mixing bowl, sift together all the dry ingredients – APF + Baking soda + Baking Powder + Cocoa Powder + Coffee Powder + Salt.
4. Add the dry ingredients to the wet or vice-versa. Now, we are trying to get a tight dough here. Add milk (only if needed) a few drops at a time for this. Don’t just add 2 tbsp of milk because the recipe says so – you may end up with a gooey mess.
5. Pat the dough to form a flat disc, wrap it in a cling wrap and put it away in the fridge for 30 minutes.
6. Preheat the oven at 350F and line a cookie baking tray with parchment paper.
7. Take out the dough and roll it into a sheet about .25 inch in thickness. Since the dough got butter, I did not find it sticking while rolling, but if you do, roll it between sheets of butter paper. If the dough is still hard, let is sit on the counter for 10-15 minutes and then roll it.
8. Now comes the fun part from where my 6 year old takes over. Use cookie cutters to cut out cookies and sprinkle them with decorations. We found the pretty snowflake ones at Bulk Barn. Press down the sprinkles a bit into the cookies so that they stick after baking.
9. Bake the cookies for 10 to 12 minutes. The sides will get slightly browned but there will not be a huge color change.
10. Cool them completely on a wire rack before storing in an air tight container.

IMG_1113 (1)
My notes –
1.I would skip the coffee powder from the next time. ¼ tsp does not lend any coffee flavor and the granules don’t get evenly distributed in the dough, giving a bitter bite in the cookies where they remain.
2.Don’t cook small and big cookies in one batch – the smaller ones bake faster.
3.You may not need milk at all. Don’t add it just because the recipe mentions it.

Eggless coconut cookies

Standard

This one is a keeper – a super hit which I had to put on here, just in case I lose the bookmark. These are not the soft baked type which are popular In North America but are crunchy – pretty much Indian biscuits style. I made them exactly as mentioned in the original recipe at Ruchi’s Kitchen. The blog has most of the recipes explained step-by-step and I keep going back to it every couple of days to bookmark more.

DSC_0723

Recipe source – Ruchi’s Kitchen

Ingredients – (made 40 cookies)

2 cups All-purpose flour (maida)

1/2 tsp Baking soda

1/2 tsp Baking powder

1.5 cup Unsweetend desiccated Coconut ( I buy mine at the Indian Store. Goes by the name of ‘khopra boora’)

1 cup Butter (softened, at room temperature).

1 cup Sugar

5 tsp Milk

Few drops of  Vanilla essence

Method –

  1. In a clean, dry mixing bowl, sift together the flour + baking soda + baking powder.
  2. Cream the softened butter and sugar in a mixing bowl. I used my hand mixer on low speed for 3 minutes.
  3. Add  in the flour mixture from step one, coconut, milk and vanilla essence. I give up the hand mixer at this stage and trust my hands to knead and bring the whole deal together.
  4. Divide the dough in manageable chunks – I divided it in four smaller portions.
  5. Roll these dough portions slowly to form logs. The log can be thick or thin depending on the cookie diameter  you want. The cookies will be made by slicing these logs across the breadth.
  6. Put these logs in the freezer for 30 mins. I would think just putting them in the refrigerator should work too, but I am usually in a hurry.
  7. Preheat the oven to 300F.
  8. Take out the logs and slice them into equal sized discs. The thickness should be about half an inch. Arrange them on a cookie tray lined with a parchment paper.
  9. I sprinkled some granulated sugar for a fancier touch.
  10. If your oven is not yet preheated, put the entire cookie tray with the cookies in the freezer. This prevents cookies from expanding.
  11. Bake for 20 minutes. When you take them out, they will be soft.
  12. Let them cool for 15 to 20 mins. Once completely cooled, they are super crunchy.

DSC_0726

Someday, I want to try –

  1. Replace one cup of flour with oats flour.
  2. Replace vanilla essence with cardamom powder.
  3. Add saffron to the milk.
  4. Make these with ghee instead of butter.

Gajar ka halwa – using condensed milk

Standard
Made in an hour!

Made in an hour!

I made this halwa after maybe seven years – because of Gretchen Rubin! I was hearing her podcast where she says – ‘Don’t let perfect be the enemy of good.’ The message stayed with me and I realized I have quit cooking a lot of stuff just because I lack the time, energy or resources to make it the perfect way – which is the only way my mom would make it. She toils for hours to get the perfect thing, ignoring all the shortcuts I suggest over the phone. Though I have moved on to a lot of ‘microwave cooking’, there are things I feel are too pious to be tweaked around – as if I will hurt the feelings of the dish if I apply a a shortcut to it. One of them is gajar ka halwa – the real thing is simmered for hours on a slow flame to get the right texture and consistency. I did not even want to go anywhere near it, but the downside was that Aditi would never get to taste these delicacies which I grew up eating. I am the only person who links her back to her roots through my food. So I made up my mind and went ahead with this shortcut / one hour deal – and it was not bad at all! I will keep making it the same way – quick and tasty is the new perfect for me!

Ingredients –

Carrots (grated) – 8 cups. (I used my hand grater, took 20 minutes to grate this quantity).
Sweetened Condensed milk – 1 tin (Eagle brand is what I got)
2% skimmed milk – half cup
Cardamom/ Ilaichi powder  – 3 tsp
Ghee/ Clarified butter – 1 cup
Almonds, Pistachios, Raisins – chopped – half cup
Sugar – not required. The sweetened condensed milk suffices.

Method –

  1. Heat ghee in the wide, thick bottomed wok.
  2. Add the grated carrots in. Though 8 cups might look like a huge quantity, the carrots shrink to nearly 2/3 of their volume within first five minutes of cooking.
  3. Stir the deal so that all the carrots are coated with the ghee. Keep stirring till the carrots turn all glossy. This takes 7 to 8 mins on medium heat.
  4. Add in the condensed milk. All of it. Also add the 2% milk.
  5. Keep stirring intermittently.
  6. Add in the chopped nuts. I usually grind a few almonds to powder and add – it gives body and richness to the smooth and creamy halwa.
  7. After around 20 minutes, the milk will start to get absorbed and the carrots will start to look glossy due to all the ghee.
  8. Add the cardamom powder and mix.
  9. Keep stirring and mixing for another 10 mins or till all the liquid has gone and it is all smooth, rich and creamy semi solid state.
  10. Switch it off – add more nuts if you want to. Best served warm. Store in the fridge for like a week.

P.S. Here is my post to the authentic and lengthy way of making gajar ka halwa.